Leaderboard


Popular Content
Showing content with the highest reputation on 04/01/2020 in all areas
-
I've been here for a while, but I think it makes sense to give you guys some info on myself. I'm KTup710, most people just call me KTup. I've always been a fan of NHL94, specifically the genesis version. Played it a ton when I would visit my grandma's house when I was a young lad. Since then I've become infatuated with ROM hacking in general, but 94 is one of my favorite games to tinker with. You may know me from Skip's IIHF ROM, I did some graphic work there. When I'm not editing, I'm probably on the ice, as I've been a goalie for about 8 years now. Anyway, just wanted to give a quick bio! Hope to see ya on the ice.2 points
-
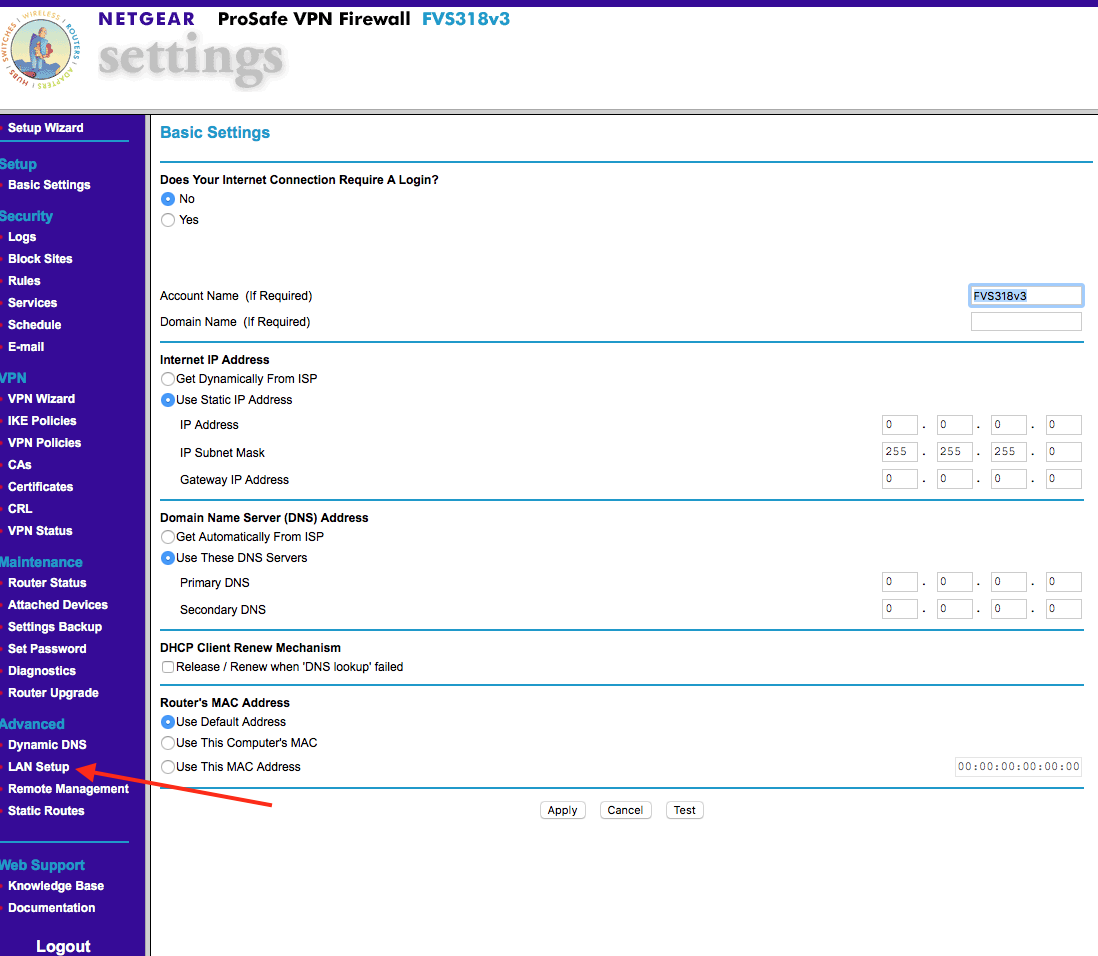
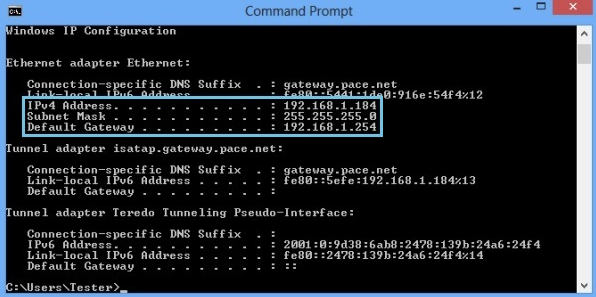
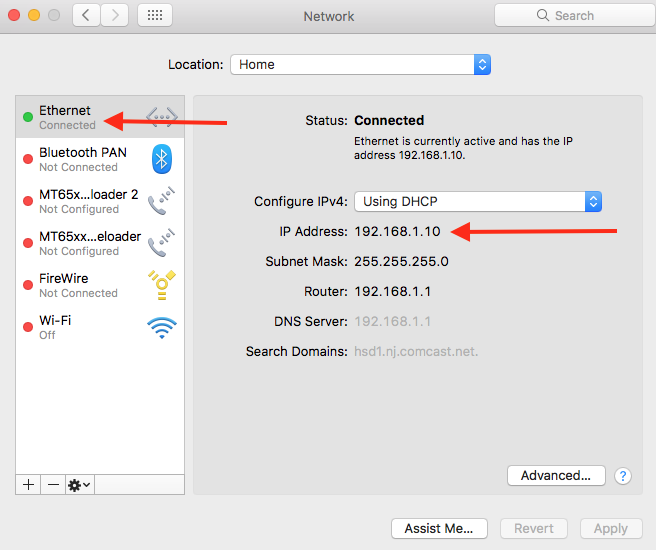
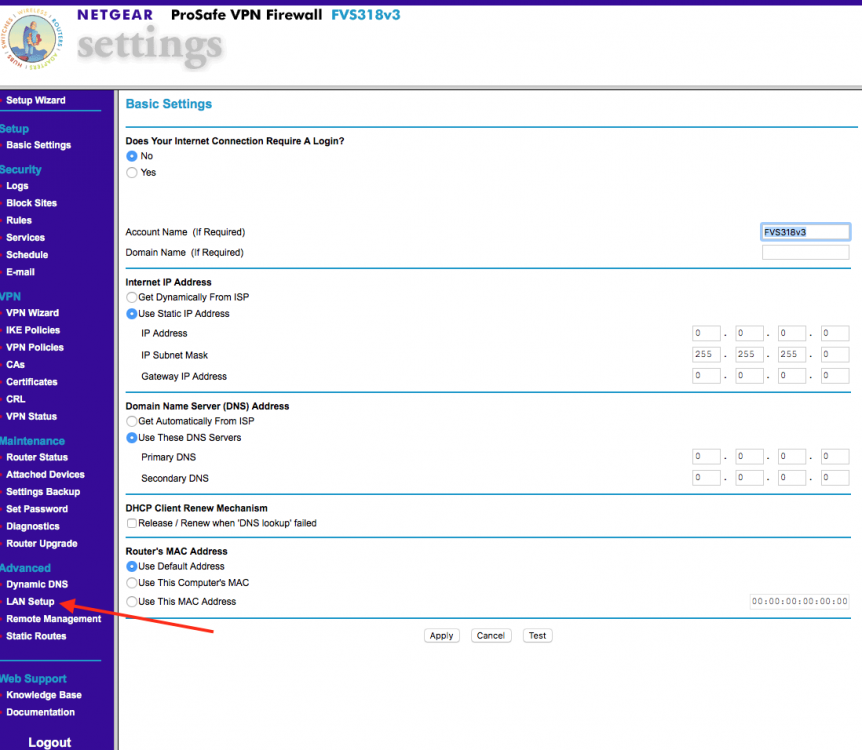
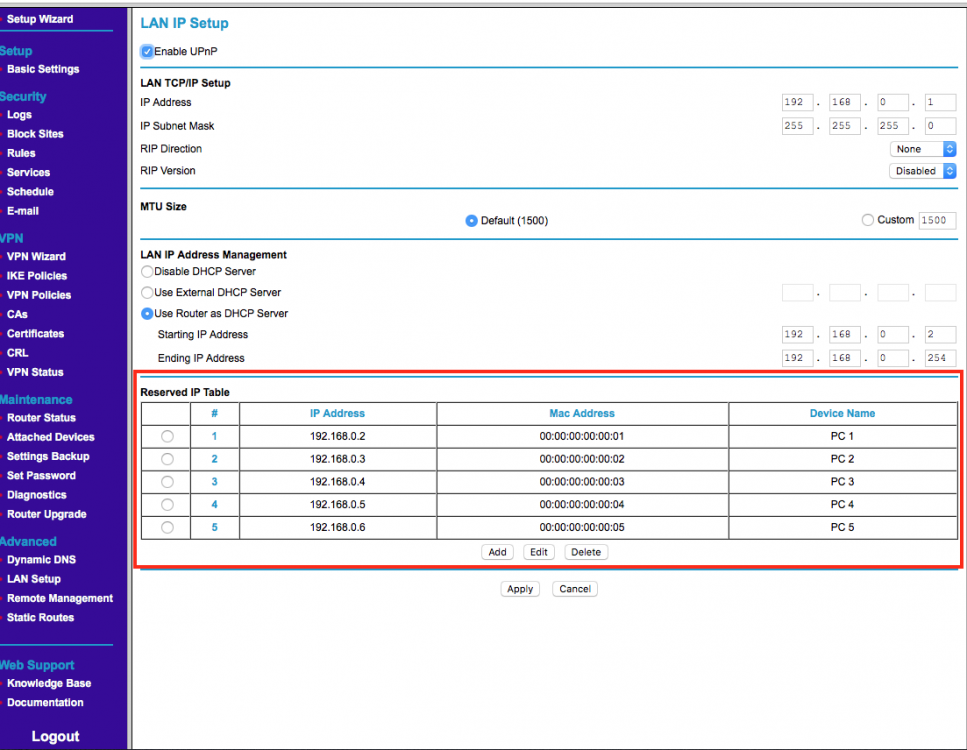
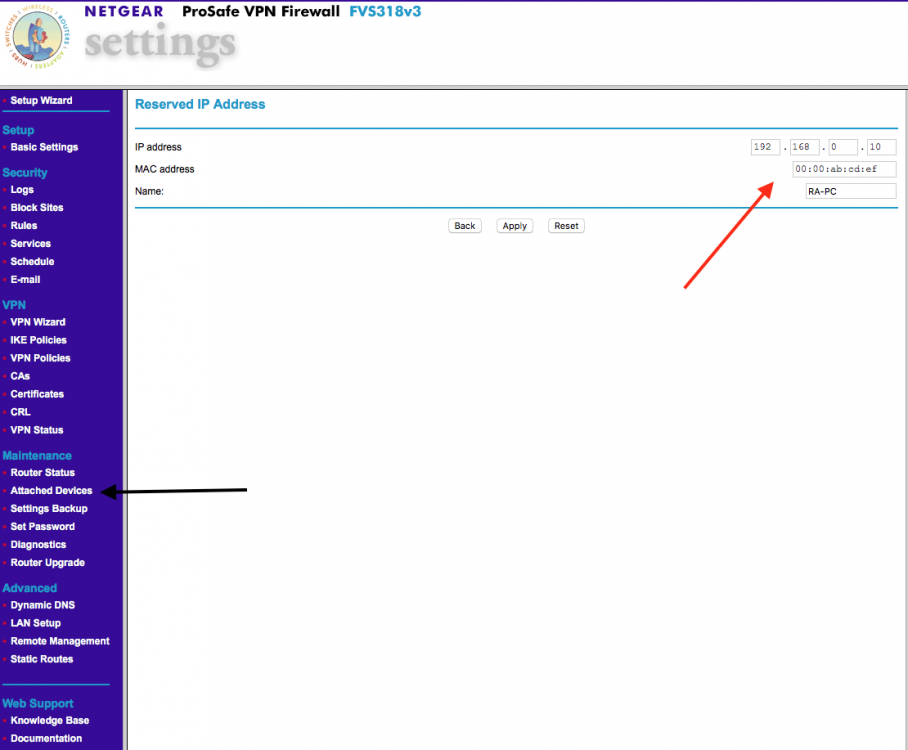
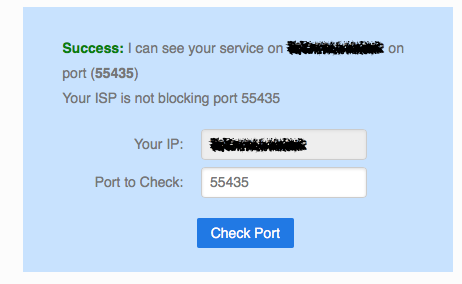
With the upcoming season of Classic, I would like everyone to use Direct Connect for netplay. As of this date (10/14/2019), relay server is not working. This is actually very simple to set up. Just requires a few minutes of work, and more time to find the instructions for your router/modem. Check out this video from therexershow - RetroArch - How to Set up Port Forwarding Introduction When playing a game against someone via netplay (P2P - Peer to Peer), one player acts as the host (or server), and the other acts as the client. The host creates the game, and the client connects to the host. In order for a connection to be made, the host needs to allow some kind of access to the client. This is where something called a "Network Port" is used. By opening a specific port, the host allows the client a direct connection to their computer. Now, it is important to note that the port is ONLY OPEN when it needs to be, and is opened and closed by the emulator. For instance, Player 1 hosts a game. They turn on netplay hosting. They start the ROM. At this point, the emulator opens a specific port (designated by the emulator). The client then connects via the network port, and has a direct connection with the host. The game begins, and everyone has fun. This situation sounds very simple, and it is. Where it gets complicated, is when there are multiple devices that the communication has to pass through, like a modem, router, switch, etc. Then, on top of that, everything has its own firewall, limiting unwanted and wanted connections from the internet. This is where port forwarding and uPnP come in to help streamline the communication. Just for clarity, all the stuff on the host's side of things affects if the communication can be established. The emulator on the host's side just puts up a message, saying "Hey, anyone want to play", where the client's side says "I want to play with you, specifically". Since the host does not know the specific client who is connecting to them, it's security features (router, Windows firewall, etc) will prevent the connection. Therefore, the security stuff on the host's side is the one that has to provide the exception to allow the connection (i.e. port forwarding or uPnP). So, if you plan on hosting netplay games, you need to set this up. IP Address - The network address assigned to your network card in your computer. Note, you will have 2 separate IP address for WiFi and Ethernet, because they are 2 separate "cards". When you are connected to a router, your router will assign a "local" IP address to your computer and other devices. These usually start with 192.168.x.x, or 10.10.x.x. Your ISP (Internet Service Provider) assigns your router an IP address, which is used by the internet. If you type in "What's my IP" in google, it will show you your router's IP address. Those people who don't have a router, and just have their computer connected directly to their modem, don't have a local IP address. The IP address assigned by their ISP is given to the computer. Note, your "modem" might actually be a modem/router combo (check and see if it has an antenna and multiple ethernet ports on the back of it), and in that case, works like a router (see above paragraph). uPnP (Universal Plug-n-Play) - A feature in some routers that allows a workaround to port forwarding. It kind of lets the program choose a port, and configures port forwarding on the fly. Many new routers (2010+ I'd say) have this feature, and it is most likely disabled by default. This is the easiest solution. DHCP Reservation - Reserves the local IP address for your computer on your router. This keeps the IP address of your computer from changing, and is important to set, because we use a local IP address when setting up Port Forwarding. Port Forwarding - This is an exception to the security features of your router. We allow a local IP address (your computer in this case, set with DHCP Reservation, so it never changes), the ability to open and close a port through the router firewall. This allows the client's communication to pass through, and directs it (or forwards it) to the correct local IP address. To do either uPnP or Port Forwarding, it will be very helpful to download your router's instruction manual. Most manuals will have sections instructing how to log in to your router, set up uPnP, DHCP Reservation (might also be called IP reservation), and Port Forwarding. If not, you should be able to find instructions pretty easily on the internet via search engine. uPnP Setup uPnP or NAT Traversal, is the easiest way to set up direct connect. But, you need a router that supports uPnP. The easiest way to check is to do a google search of your router model with uPnP. If you can find your router instruction manual, this would be perfect. Step 1: Log in to router - Look up instructions online how to login to your router. Go to a web browser, and type in your router's gateway IP address (usually 192.168.0.1, or 192.168.1.0, it will say it in the instructions). You will be asked for a user name and password, enter those (again refer to instructions, they should be a default, something like "admin" and "password"). Note, the only computer who can login to your router, are those that are connected to it (outside people cannot login to the router). Step 2: Turn on uPnP - Refer to the instructions on how to turn on uPnP. If there are any other uPnP settings, just ignore them. The default values will work fine. Step 3: Turn on NAT Traversal in RetroArch - This setting should be turned on by default if you have downloaded the package from nhl94online.com as of 10/14/2019. - To check if its turned on (or if you need to turn it on): Open RetroArch Go to Settings-User Interface. Turn "Show Advanced Settings" to ON. Go to Settings-Network. Turn "Netplay NAT Traversal" to ON. Go back to Settings-User Interface. Turn "Show Advanced Settings" to OFF. Close RetroArch (to save the configuration if needed). Restart and play! - Note: This only needs to be done once. Once it is turned on, the setting does not have to be touched again. If you have Port Forwarding set up, it will use Port Forwarding before it tries uPnP. - Note: You may see a "Port Mapping Failed" error when hosting a game when this setting is ON. This indicates if uPnP is working. If you plan on trying your uPnP connection with your router, you want to see a message that says "Port Mapping Successful". If turning on uPnP, you still get the "Port Mapping Failed" message, you will still need to go through the port forwarding procedure. Port Forwarding Setup Part 1 - DHCP Reservation Step 1: Find your computer's current IP address - This may or may not be needed, depending on your router. But it's quick and easy to do. - For Windows PC: Hit the Windows key and R key at the same time to bring up a "Run" window. At the prompt, type "cmd" (no quotes). A command prompt window will open up. Type "ipconfig" (no quotes) at the command prompt. You should see a window similar to this: Write down the "IPv4 Address" of your Ethernet Adapter (might also say "Local Area Connection"). In the above screenshot, this is 192.168.1.184. - For Mac: Go to the Apple logo on the top menubar, then choose "System Preferences". A new window will open up, and inside that window click on "Network". In the Network window, select Ethernet from the left side. Your Mac's IP address will be displayed on the right side as "IP Address". Step 2: Log in to your router - Look up instructions online how to login to your router. Go to a web browser, and type in your router's gateway IP address (usually 192.168.0.1, or 192.168.1.0, it will say it in the instructions). You will be asked for a user name and password, enter those (again refer to instructions, they should be a default, something like "admin" and "password"). Note, the only computer who can login to your router, are those that are connected to it (outside people cannot login to the router). Step 3: Find the DHCP Reservation page and set it up - Look up this information on the internet, or in your router's instruction manual. This is usually located in the "LAN" section of your router's home screen. I attached a screenshot of an example. - When we open up the LAN section, we see the following page. You'll see a section referred to as "Reserved IP Table", usually called something similar to DHCP Reservation. You will see some entries already here in the screenshot, but most likely on your router, it will be blank. Click the Add button. (Also, note at the top of this screen, this router supports uPnP). - On the Add screen, it asks us to enter the IP address, MAC address (physical address of network card), and a Device Name. If you need to get the MAC address, we can go to "Attached Devices" (black arrow) and get the MAC address of the network card by looking for the IP Address on the list. On many routers, there may be a drop-down where you can select from connected devices. In this case, you can just choose your computer from the list, comparing IP address of the list to the one you wrote down in Step 1. Once done hit Apply. If you go back to the LAN page, you should now see your entry in the Reserved area. - Now, you have reserved your IP Address for your computer. This insures that whenever your computer is restarted, or whenever your router decides to change up the IP Addresses, the one set for your computer will not change. Now we can move on to Port Forwarding. Part 2 - Port Forwarding Step 1: Log in to your router - If you closed out your router screen from the previous part, log back in. Step 2: Find the Port Forwarding page and set it up - Look for your router's instructions on port forwarding. If you can't find them, it's no big deal. The page is usually located in the Advanced section or Firewall/Security section of a router. In this example, the following screen will show: - For Service Name, enter RetroArch (this doesn't matter, its just to identify it for you). - For Protocol, choose TCP. This could either be TCP or TCP/UDP. But you should not set it to UDP only. This may also be called "Service Type". - For External Starting Port, put "55435". This is the port that is used for RetroArch netplay. - For External Ending Port, I also put "55435". (This is used if you were to open a range of ports, but since we are only using 1 port, we put the same number in both spots). - You'll also notice the "Use the same port range for Internal port". If your router doesn't have this, but has Internal Starting and Ending Ports, set them both to 55435. - Rule of thumb, anywhere it says "Port", set to 55435. - For Internal IP address, you would enter the IP address of your computer. This is the address we set to reserve in Part 1: DHCP Reservation - After I'm done, I click Apply. - Note: This is a typical Port Forwarding page, but not all will look like this. There may be less things to enter, or more. Point being, any port should be set to 55435, service to TCP or TCP/UDP, and Internal IP address set to your computer's IP address. If there is an entry for External IP address, this should be set to all 0s. Testing NOTE: Windows Firewall needs to either be disabled, or allow RetroArch to pass through. When you host for the first time, a Windows Firewall message should pop up, asking if the program should be allowed to pass through. I usually check both boxes for Private and Public networks, then hit the OK button. If you hit Cancel on this message, please look up online how to allow a program to pass through the Firewall. If you set up with uPnP, the easiest way to test is hosting a game and having someone connect to you. There is no easier way to test this setup. If you set up Port Forwarding with DHCP Reservation, you should be able to test your setup. This can be done without another person. We can use a website like canyouseeme.org to test if RetroArch can open the port successfully. There are a few steps in testing this: Open RetroArch, and Start Netplay host (under Main Menu-Netplay). You can also load the ROM first, and hit the "n" key to toggle netplay host. Open a ROM. When the ROM opens, you should see a message similar to "Waiting for client..." Go to https://www.canyouseeme.org/. Enter 55435 as the port and hit the "Check Port" button. If successful, you should see a message similar to below: If you see a message that says it is blocking the port, or a timeout, double check your computer's IP address hasn't changed, and that the port forward IP address is the same as your computers. NOTE: The IP address you see on canyouseeme.org is your router's IP address from your ISP, so don't get those confused. UPDATE: I attached a program to this post called Simple Port Tester (for Windows only). This is an alternative to the testing procedure above. Instead of hosting a game, then using canyouseeme.org to see if the port is open, you can use this program. Install it, then open it. Type in the port to test, and the program will open the port itself, then try and see if it is open by using a site similar to canyouseeme.org. This is a lot easier, since you don't have to have RetroArch running when testing in this case. It is also a better test, as it can tell you if it's a Windows Firewall issue, or a port opening issue on your router. EDIT: From RetroArch 1.8.8 package and on, the Simple Port Tester is included in the package, in the "Simple Port Tester" located in your RetroArch folder. If you have any questions, please feel free to DM me in Discord (chaos). simple_port_tester_setup.exe

 1 point
 -
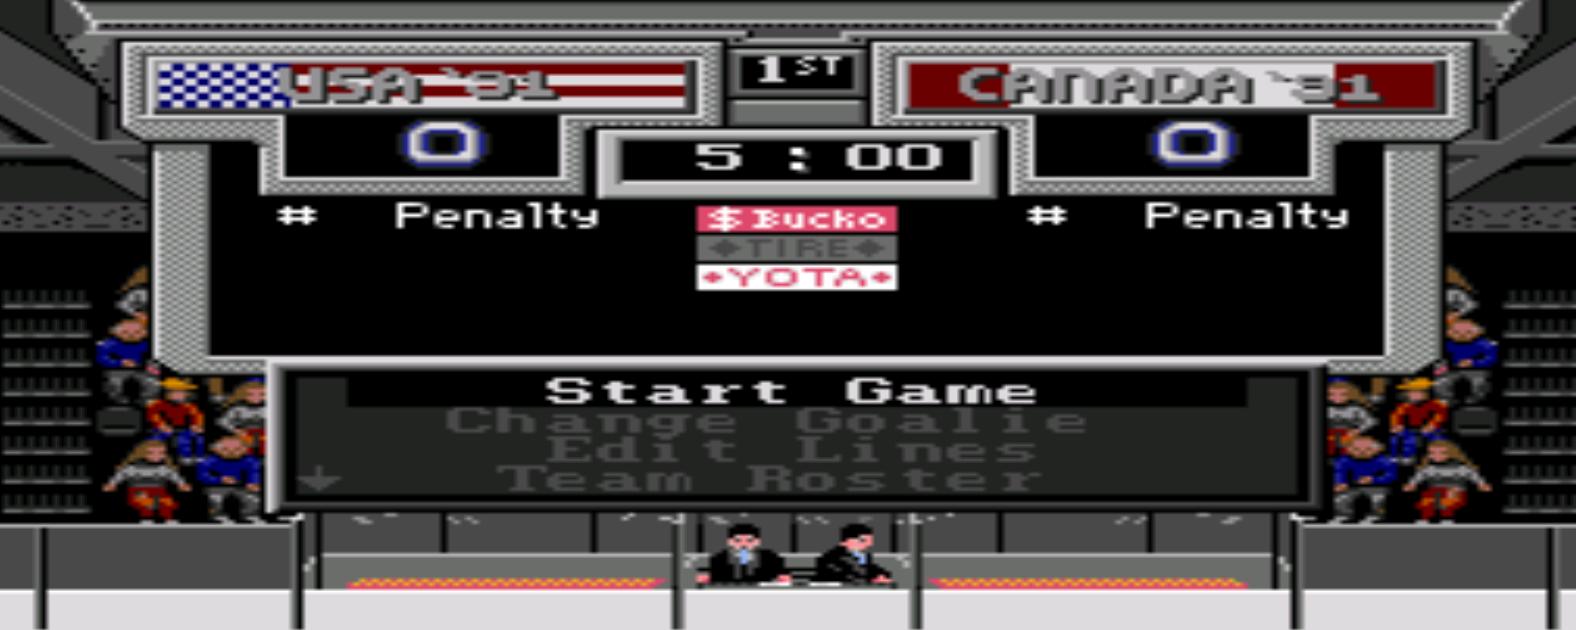
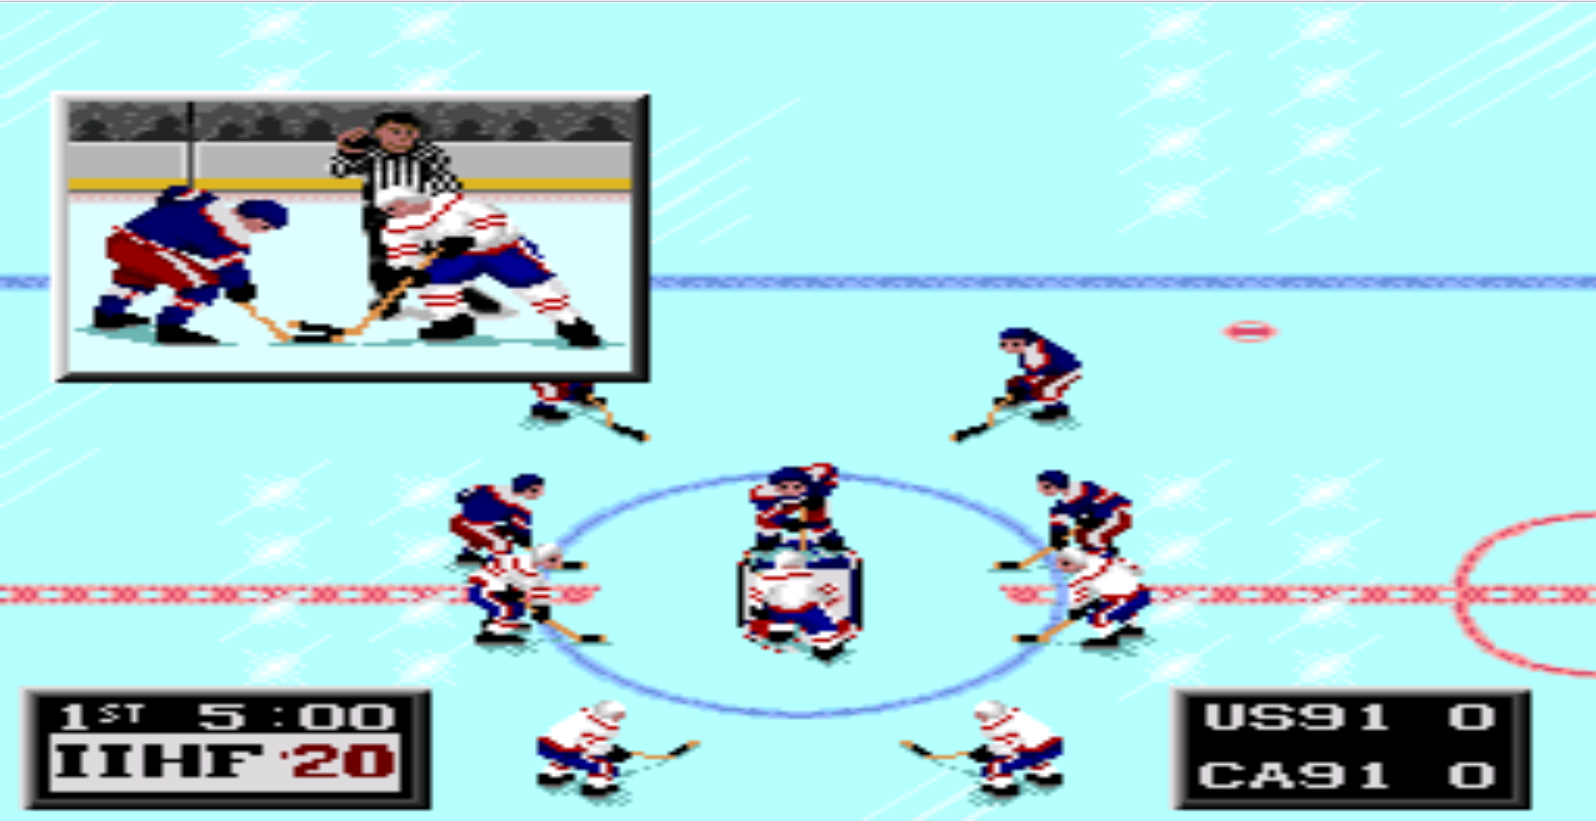
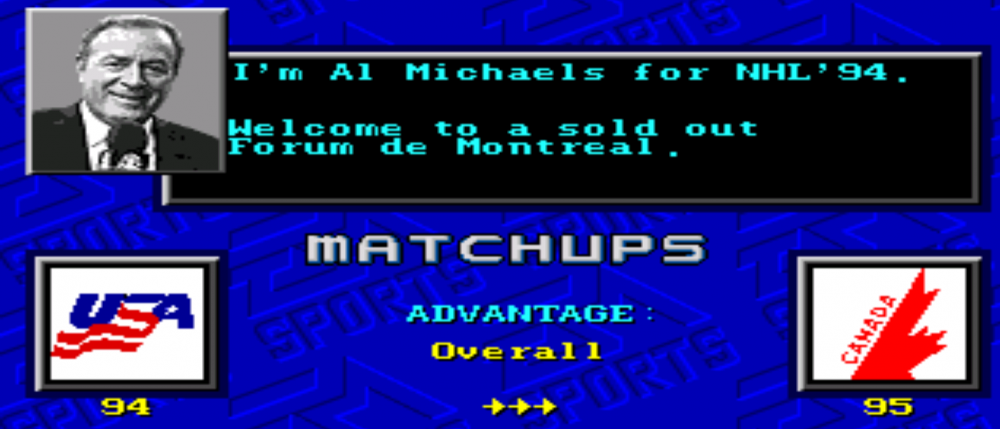
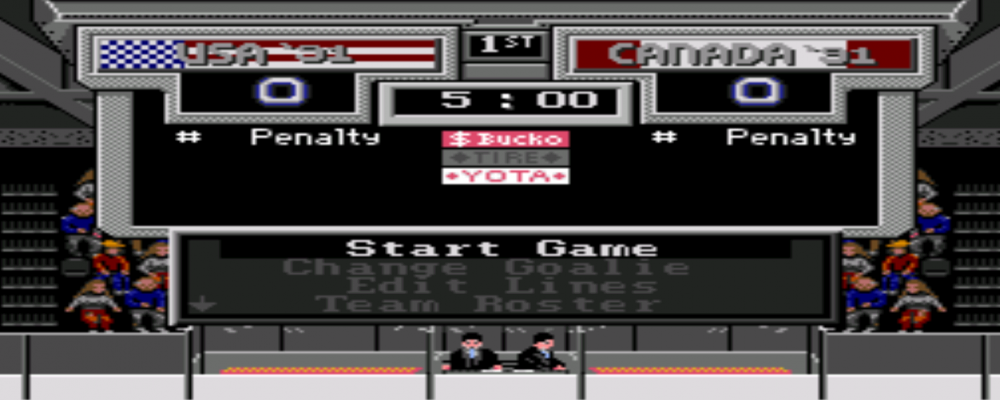
Hey guys, This is IIHF Legacy '20, and it's the 2nd 'special release' from Slapshot67, KTup710 and myself. It contains 15 current National Teams made up of what would closely resemble the real rosters in a major world tourney, and 17 historic National Teams from different tourneys. The main ROM is a WBF-rom. The 2nd ROM (suffix noWBF) is a classic style ROM that does not include the weight bug fix. The ZIP file contains the excel sheet with team & player info. WORK: KTup did all the work on the implementation of logos, and he did some incredible work on the banners. Slapshot67 did spectacular work on the announcer, players cards, splash screen, game clock...even the IIHF trophy is there! I handled the uniforms, players, player ratings, lines, and selected the logos we used. KNOWN BUG: The game will freeze if you scroll through the USA'96 player cards in the menu screen. This is a known bug that affects the 31st team on any 32 team ROM, and is not currently fixable. Some Notes I've created 17 "Classic" Historic teams, with an added twist. You'll be able to play the Miracle on Ice (1980 USA vs Soviet Union), the 1987 and 1991 Canada Cup Finals (1987 + 1991 Team Canada, 1987 Soviets, 1991 Team USA), the 1996 World Cup of Hockey Final (USA vs Canada) and the 2002 Olympic Gold Medal Game (Canada vs USA). Also included is the 1998 Czech Republic team, first NHLers to win Olympic Gold. Including them threw off the balance of 16/16 classic vs current teams, but that's ok. Of these 17 classic teams are 6 National Teams made of the original 94 ROM's players, with original ratings. Some players had to be added to complete rosters, but the original NHL'94 spirit of these 6 teams is surely there. They're the Original 6 of this ROM :-) Players & Rosters I tried to make team rosters as accurate as possible, with jersey #'s and lines as accurate as I could find. I also tried to keep ratings "within the defined spirit and parameters of NHL'94". Keep in mind players may have different ratings in different seasons (ie. '87 Gretzky is the man, '98 Hasek is unreal, and Mario went virtually untouched from orig 94 ROM). Check out the excel sheet for more on player + team ratings. I needed to add some players to complete the 1994 teams, which is why there are players who were not in the game on those teams. Also, I know Petr Nedved actually played for Canada in 1994 Olympics. But, come on, he belongs on Czech, Czech needs players, and Canada is ok without NHL94's Petr Nedved. You'll notice on some of the Legacy teams that a players weight may have changed from their original '94 weight. I made a player's weight accurate to what it was in real life, except for the six NHL94 World Star teams. I left those players as is, Tony Amonte included. Amonte is a lefty in '96 and '02. The 2020 Rosters have significant updates from the 2019 Rosters. I've also updated the 1994 add'l players to be players who played in the Olympics. For KTup and Slapshot- we all hope you guys enjoy this ROM as much as the last one. -Skip IIHF Legacy'20.bin IIHF Legacy '20.zip IIHF Legacy'20noWBF.bin

 1 point
 -
Same, it's like GENS we used before with some added graphics features. Not to get more complicated, but there is a Kaneda GENS version that I will post that also has some cool features on music, but no trace. Depending on what you need to do, these emulators are all useful.1 point
-
Btw @Skip and @Slapshot fantastic amazing job on the rom, it looks dope, graphics beautiful, esp centre ice logo. Really f**king awesome, thank you!!1 point
-
This is my first post in a LONG time as I am trying to get back into online during shelter in place...this is AMAZING. Fantastic work, guys!1 point
-
@KTup710 made them! They're pretty much the best part of the ROM lol1 point