Leaderboard

Popular Content
Showing content with the highest reputation on 01/11/2024 in all areas
-
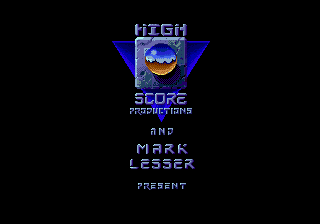
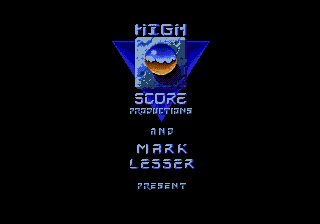
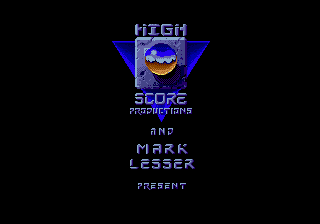
When I did my ROM, I revised the decompressed version of that screen to better match the original. I'm not sure who originally did that hard work on that one. Attached are the original, the Classic30, and the revised version.
 2 points
 -
@Jkline3 and @von Ozbourne - You absolute beauties. You two (along with @AdamCatalyst) are doing the Lord's work with this year's updates. Cheers!2 points
-
@INDIO made a 30 team Classic ROM using wboy's base. Reverted everything back to classic 94. Probably the best ROM to start out with, as it is classic 94 in the 30 team ROM format. Graphics are decompressed already.2 points
-
NHL94 Genesis ROM Image Updater version 0.2 This Python app will take image assets supplied, and import them into a Genesis NHL'94 ROM. It can also export the image assets from a Genesis NHL'94 ROM and store them in byte arrays. It is useful for exporting assets from a previous ROM and importing them into a new one. The app is designed to either update or export the following image data: Team Logo and Palette Team Rink Logo and Palette (also the Home Jersey Palette) Team Away Jersey Palette Banner and Palettes NOTE: The image data is in byte format. It can't be opened in any program other than a text editor. There are 2 options to use: Before running, please make sure the team names and rosters are already set in the ROM!! Extract Images Choose a ROM, set the number of active teams, and click the Extract Images button. The app will output a folder with the ROMs name containing image assets for each team (listed by team abbreviation). Import Images The program will use the image asset data located in the import folder (listed by team abbreviation). It will only import the image assets that are present in the folder, and the program will notify you of which teams in the ROM were updated, and which were not. Once done, it will ask you for a location and a name to save the modified ROM. Workflow: 1 - Create a new ROM and set the rosters and team names using NOSE or similar. 2 - Find the ROMs that have the image assets you would like to use in your ROM. You can find many ROMs on the forum from this post, or by looking in the league section of the forums - 3 - Start the app. Load the ROM, and click export. A message will pop up once complete. Look in the app's folder to find a folder with the ROMs name. Inside, each team's image assets will be separated in a folder with the respective team abbreviation. Continue exporting other ROMs if needed. 4 - Add the team folders you wish to use to the import folder located in the app's main folder (if there is no import folder, create a new folder with the name "import" (no quotes)). You only need to add the teams that you wish to change. You can also remove the data in the team's folder that you do not wish to update (for instance, if you only want to update the rink logo and palette, leave them in the folder, and delete the other files). 5 - Load your new ROM into the app. Then, click the Import button. The app will notify you which teams were updated, and which teams were not. Then, it will prompt you to save the modified ROM. Afterwards, check in an emulator to make sure the image assets were transferred over. Zip file contains a Windows executable. You can get the source code from my GitHub - https://github.com/Chaos81/nhl94-image-updater Sorry, I've had this for over a year, and never posted it on here!!! Image_Updater_ver02.zip1 point
-
You can replicate the original splash screen, but you'd have to use two palettes for the picture, which is what the original splash does IIRC. So while this is technically feasible for people who understand how to change palettes on specific tiles, it would not make for a good "template ROM". It's much simpler when most of the graphics use one palette for the whole picture (WYSIWYG in TM) method.1 point
-
Advice for Modders, Meddlers, and other Creative Rabble-Rousers (last updated 2024 01 03) Getting Started Start with as clean a ROM as possible. This will make it the easiest to edit, and puts you in the position of having the most creative control. I recommend starting with either the 28 or 32 team templates, and/or an original verified [!] good ROM dump. Beyond being able to accommodate more teams, the templates have the advantages of many of the graphics already being "de-compressed", which will make editing much easier. Just note that the templates are not "clean", in that they have some elements modified or removed that you may want to preserve or restore. I sometimes find myself going back to the original ROM to verify how things originally were. Basic good practices: Make sure that you have a file versioning and naming syntax system, as well as an automated backup system. Document everything that you do. Go slowly at first. When in doubt, change one variable at a time. Read lots of forum posts and do the tutorials. Even ones that you think don't apply to you. Valuable knowledge can be found in unexpected places. Don't be afraid to start over, multiple times. If you've documented things, this might go shockingly quickly. Learn from Others Review the detailed tutorial posts that folks have taken the time to write, the newer the (usually) better. The more you see the entire picture, you start to see patterns. The more patterns that you start to recognize, the faster you will get, and you will start to be able to make off-the-books discoveries of your own. Play lots of other people's ROMs. Take notes. Don't blindly apply pre-made patches to your ROM. Run a comparison after patching, to see exactly how the code has changed. Try to understand what was changed and why. Imitation is an underrated form of learning. Look at what others have done (and you admire), and then try to re-create it yourself. The process of manually recreating something is an invaluable learning process, where you can build explicit and implicit knowledge. Furthermore, even if you start with imitation, you will naturally make different specific choices along the way that will eventually lead to it becoming your own thing. Don't re-invent the wheel if you don’t need to. As a counterpoint to my advice to start with as "clean" a ROM as possible, or trying to manually imitate things, don't be shy about ripping off code from other people's ROMs. But always give credit where it is due. And if in doubt, give credit. You should clearly know when something was the result of your labour alone. Share what you know. But also share what you have found, but don’t understand. The more the community knows, the more than community will be able to help you. And your loose ends might be someone else's treasure. Getting More Done Use a comparison tool (I use “Beyond Compare”) to help isolate relevant differences in code from one person's ROM to another. By comparing ROM "A" and ROM "B", I've been able to sometimes make new discovery "C". This is my #1 tip for anyone. Consider using a prioritization model, such as MSCW, where you define what a release Must do, Should do, Could do, anger very importantly, Won’t do. Further to that last one… Give yourself limitations. This can be just as important as goals for some people. Develop efficient testing routines. This can take up a lot of time. Stop and think about re-designing your workflow from time to time. Personal Development Get off the computer. A good idea to play, then work on paper. All tools and interfaces have biases that effects us. Find the ones that wrk best for you and/or change things up to help you change up your thinking and doing. Make big picture decisions about art direction, creative direction, colours, etc. Give yourself both strategic guidance and limitations. Figure out what you want to do before you do it. Unless you find yourself stuck with indecision. In which case, just start doing it, and figure out what you want later. Make mistakes faster. Figuring out how much time to spend planning and critically evaluating plans versus just mindlessly doing is a lifelong challenge. It’s easy to waste time either which way. In my personal teaching, I personally find that most people over-think things. Push yourself to mockup up ideas as quickly as possible. If it’s a good idea, that will show up in a terribly rough mockup. But there is no way to know for sure until it is tried. Consider separating your personal creative process, your personal critical processes, your personal technical execution process, and your personal skill building processes. “Creatives” who work alone sometimes face paralysis from trying to think through too many roles at once. If you are an army of one, consider role-playing through different steps. For instance, when you’re creative, create with reckless abandon. Do not pre-judge. When your creative session is up, hand it to your critical self, and assess what is working, what isn’t, and give your creative self directives for the next creative session. This may sound silly, but trust me, I’ve been teaching young designers for over a decade, and this compartmentalization can be extremely helpful. Specific Areas of Interest Before editing player sprite uniforms, be aware that different ROMs have already changed the layout of the colours on the uniforms. This is a huge amount of work, and your ROM might benefit from taking the player sprite tiles from another ROM. You Amy also be able to make the changes that you want more easily by “diffing” two different sets of player sprites, in order to isolate key elements or colours… …Speaking of Colours Make sure that you are familiar with basic colour theory using a Hue, Saturation, Value model. Understand that human beings perception of tone is much more consistent than their perception of hue. Furthermore, we are much more sensitive to contrast of tone than contrast of hue or saturation (hence why we use 4:2:0 encoding in video etc). So, when making colouration decisions, you usually want to err on the side of prioritizing tonal relationships over accuracy in hue over accuracy in saturation. This usually looks better. You can toggle your screen into black & white mode to review the tonal values. “If your colours don’t work in black & white, your colours don’t work.” ® When selecting your colours, it is very helpful to have an overall concept of the colouration that you are looking to achieve. For instance, should it look realistic? Like watching a game in person? Vibrant? Like watching a game on TV in the current day? Like watching archival footage of a game? Like it was shot on film? Shot on video? A great example of this is @von Ozbourne's Olympic Hockey 1920 ROM. Consider your colours holistically. Put together a meta-palette of all the colour palettes in your ROM. I found this approach extremely valuable in setting the overall look and feel. When you track the relationship between the pink colours of players faces, the pink colours audience members faces, and the pink-ish highlights on red sweaters etc., you are able to make decisions that have a more immersive holistic impact. You might consider something like this as a start: While it is useful to look at the official colours for team logos, etc. understand that the colour that you see is not the same thing as the colours that are specified. There are all kinds of other factors that affect our perception of colour, including the lighting that it is shown with, the texture of the fabric the colour is applied to, any mediating lenses or recording mediums, etc. If going for anything other than an unnaturally vibrant presentation, you will likely want to skew those official colour values towards your intended art direction effect. Aside from collecting official colours, you may also want to collect image references for the colours that you are trying to achieve. For instance, grabbing a bunch of screen captures of recent broadcasts of Leafs home games will depict the blue colour of the Leafs uniforms differently than the official RGB colour values. You can use tools like the built-in “Digital Color Meter” on a Mac to sample the colour values used in the photos. Use a large aperture size to average the values in a range of contiguous pixels at once. Furthermore, note what you are sampling (sweater shadow, helmet highlight, etc.) to get a sense of how those official colour value transform in an image. If using official colours, you will inevitably come across scenarios where it is unclear what the Sega MD / Genesis equivalent will be. In general, I would advise in always “rounding” colour values in the same direction for relative consistency, but in some case it may be desirable to have exceptions, when considering the overall colour palette of your ROM. Further to the last tip, you will inevitably also encounter scenarios where you will want to darken or lighten an official colour in order to depict shadows and highlights on a players uniform, or anti-alias a logo, etc. Again, I would advise to make these adjustments with relative consistently for a more immersive effect, but you will also want to consider your art direction etc. It can be helpful to understand that in real-life colours look less saturated than when shown on a back-lit display like a television. Furthermore, in real-life a medium tone colour will usually appear to de-saturate (towards black) as less light is applied to it, and conversely appear to saturate more heavily as more colour is applied to it. However, eventually when too much light is applied it, it will again appear to de-saturate (towards white). When watching a game on a screen, the colour-grading on the broadcast (as well as the colour grading on the display device) can sometimes diminish this effect by compensating with more saturation, particularly in shadows. I don’t recommend importing images into TileM and using using TileM to reduce or assign the colour palette, as it often does a mediocre job. I highly recommend defining the colour palette in TileM or Retro Graphics Toolkit or similar software, and then assigning those colours manually in software like Photoshop for much higher quality results. Hand coloured (and had-drawn) almost always looks better than auto-coloured or (auto-digitized.) Tools that I Don’t Use, but I Do Recommend EA NHL Specific EARE (Smoz’s “EA Rom Edit” utility) https://forum.nhl94.com/index.php?/topic/10443-eare-ea-rom-editor-for-nhl94/ Libre Office Calc (free spreadsheet software) https://www.libreoffice.org Microsoft Excel (more powerful spreadsheet software) https://www.microsoft.com/en-CA/microsoft-365/excel Tools that I Do Use EA NHL Specific NOSE (Wboy's “New Old Skool Edit” app) https://forum.nhl94.com/index.php?/topic/26368-nose-latest-version-download/ NHL Hockey Roster Tool (tool for quickly exporting / importing rosters too and form CSV) https://forum.nhl94.com/index.php?/topic/11779-tool-roster-extracterimporter-tool/ Smoz's Patch Applicator (quickly and easily apply some popular hacks and patches) https://forum.nhl94.com/index.php?/topic/12181-tool-hack-applicator-aka-smozrom/ Rosters, Lines, etc. Apple Numbers (any good Spreadsheet apps will do. Every one has some uniquely valuable tricks, but lack some functions that others have.) https://www.apple.com/numbers/ Table Capture (utterly invaluable browser plugin for scraping data) https://www.georgemike.com/tablecapture/ Text Sniper (useful for quickly grabbing any text / numeric / tabular data from a web page) https://www.textsniper.app Visuals Adobe Photoshop Desktop (Bitmap editing, Dithering, Image Comparison, Rasterization, and nearly anything image related) https://www.adobe.com/ca/products/photoshop.html Adobe Photoshop Tablet (manually drawing / editing dithering with a stylus.) https://www.adobe.com/ca/products/photoshop/ipad.html Apple’s Digital Color Meter https://support.apple.com/en-ca/guide/digital-color-meter/welcome/mac HivePal (Palette editor) https://www.romhacking.net/utilities/1182/ Retro Graphics Toolkit (Dithering, Palette editing, and other specialized tasks) https://github.com/ComputerNerd/Retro-Graphics-Toolkit/tree/master TileMolester 0.16 https://www.romhacking.net/utilities/109/ Coding, Testing, & Export AFS FIX CS MD 32X (checksum fixer) https://www.romhacking.net/utilities/1610/ Beyond Compare (file comparisons and more) https://www.scootersoftware.com I can’t stress this enough: I have personally found file comparison software an utterly invaluable tool. I use "Beyond Compare" almost as much as I use my HEX editor. This enables me to isolate mods, quickly change variables, search for things way more effectively, debug way faster, and do a much higher level of quality control. I’m still discovering new ways that it can speed things up. Genesis Plus GX (more accurate Genesis emulator) https://github.com/ekeeke/Genesis-Plus-GX Hex Fiend (any Hex Editor will do) https://hexfiend.com OpenEmu (best emulator choice if you are on a Mac) https://openemu.org MultiPatch (best patching utility if you are on a Mac) https://projects.sappharad.com/multipatch/ Sega Genesis Mega Drive ROM Analyzer (great for reviewing header info) https://www.romhacking.net/utilities/1344/ Sublime Text (any good text editor to edit TileMolester XML or similar files) https://www.sublimetext.com More Please! Got any advice, tips, tricks, or other insights that you're willing to share? Please leave a post below!
 1 point
 -
Great work, @AdamCatalyst. I have not been active on the forum for ages (life has gotten in the way) and I am looking forward to loading this onto my Retroid Pocket 2+ in a couple of minutes and wiling away the time during my flight tomorrow morning. Cheers! @Drewbdoo71 - I use a RetroArch front end with my RP2+ and use the Genesis Plus GX core for Mega Drive / Genesis games. It works perfectly, although you might need to reconfigure / remap the control buttons. If you get stuck, have a look at this site, as it includes really easy-to-follow workthroughs and videos that focus on maximising the potential of most RP builds / models (including the morer recent ones): https://retrogamecorps.com/2022/01/16/retroid-pocket-2-starter-guide. I hope that this helps.1 point