Leaderboard


Popular Content
Showing content with the highest reputation on 09/04/2020 in all areas
-
COMPLETED!!! A huge thank you to @Jkline3 for the Banner options and roster details (MAAAAASSSIVE help), @wboy for NOSE, @kingraph for the mapping, @smozoma for Ditherer program. This game has provided an apprciation for each one of you and the impact you had on this game. NCAA 21' is here dawning NHL95!!! There are 2 options (One with traditional banners and the other with the new and improved). Let me know what you think regardless. NCAA'21(95)Alternative Banners.bin NCAA'21(95).bin
 2 points
 -
Raph's got the info: He mentions "that particular wireless" because other types (i.e. bluetooth) can be really laggy. But that one should be fine. Also you can throw it farther that way after missing a wide open net in the final seconds.2 points
-
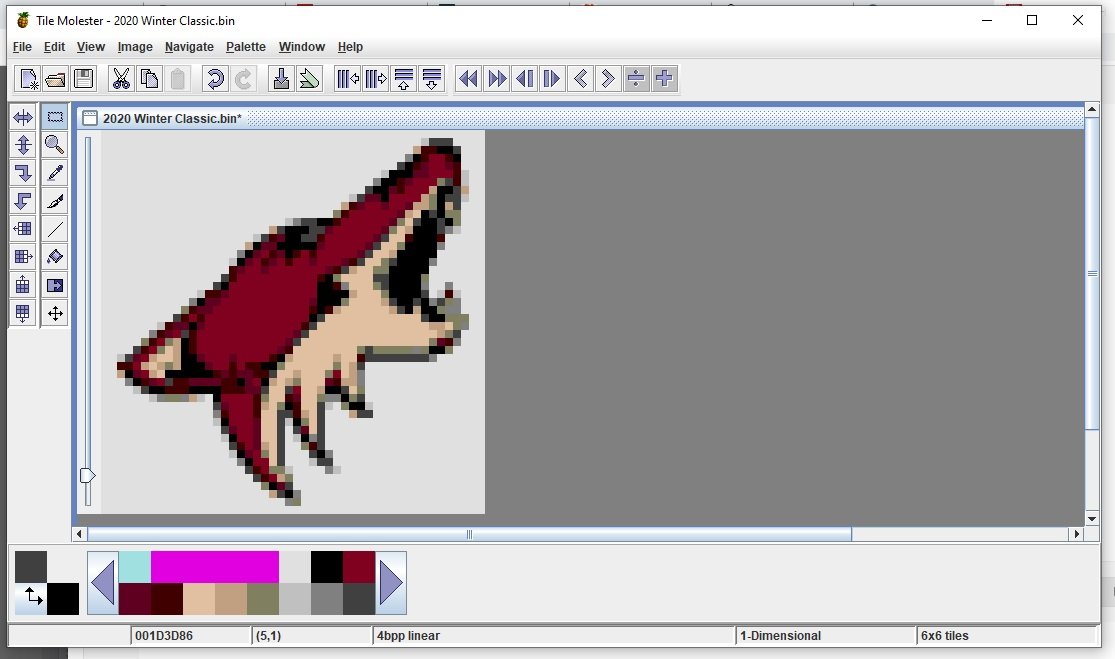
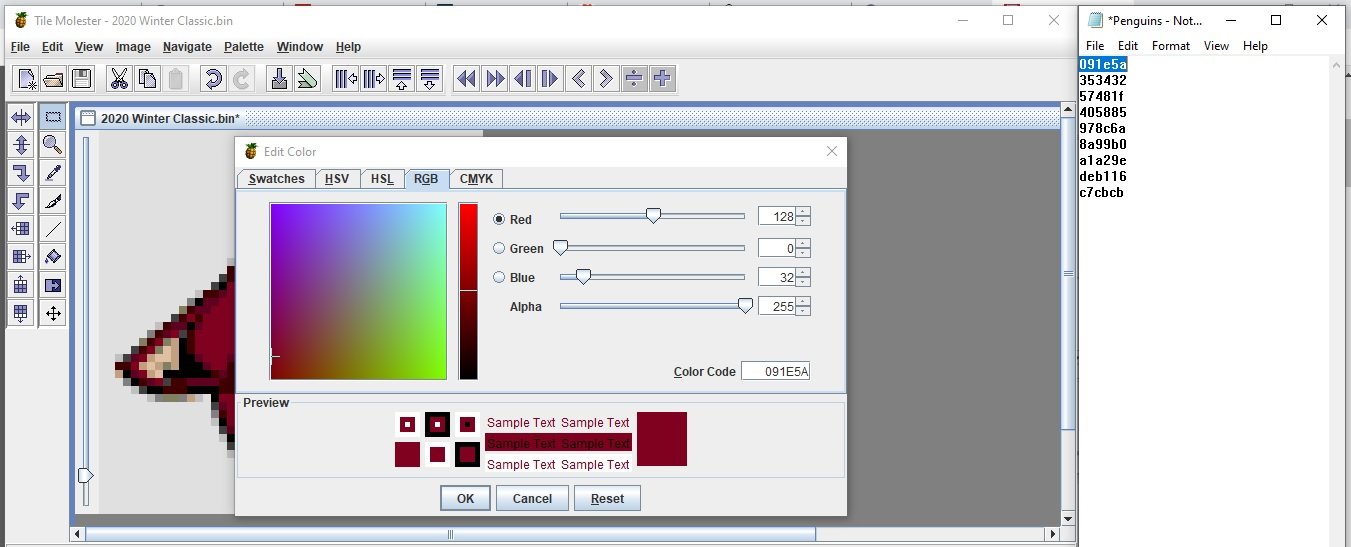
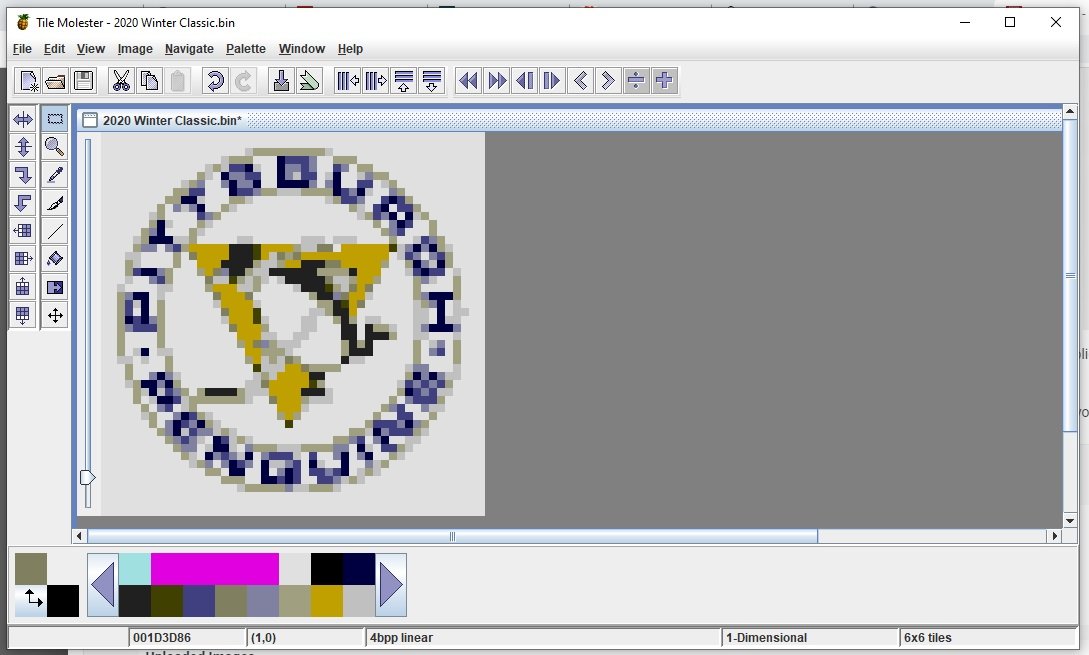
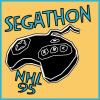
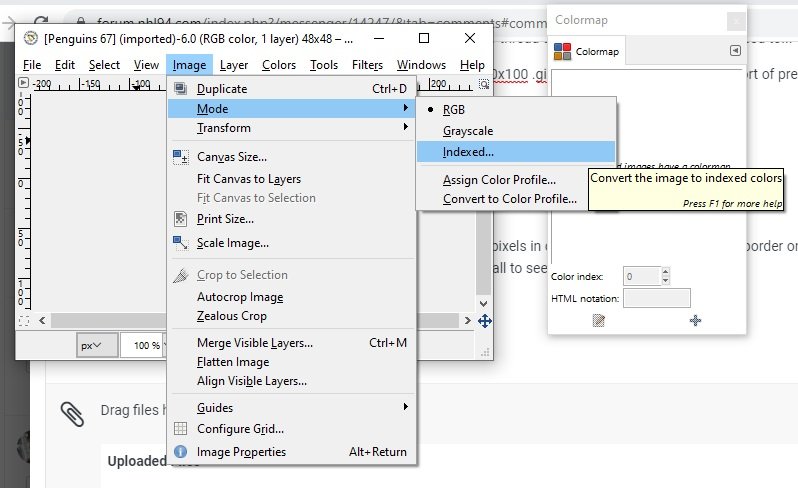
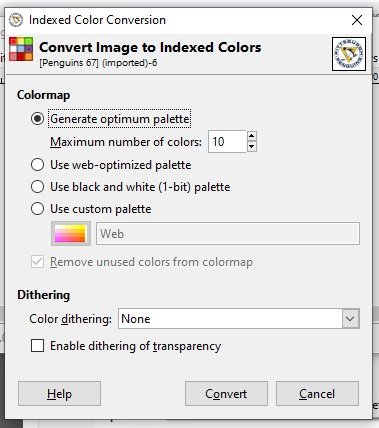
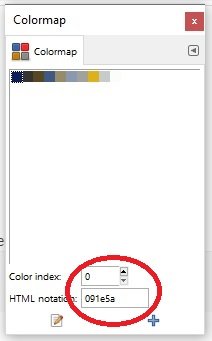
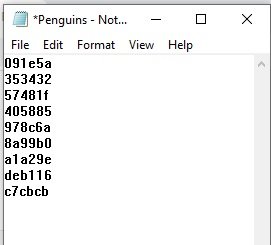
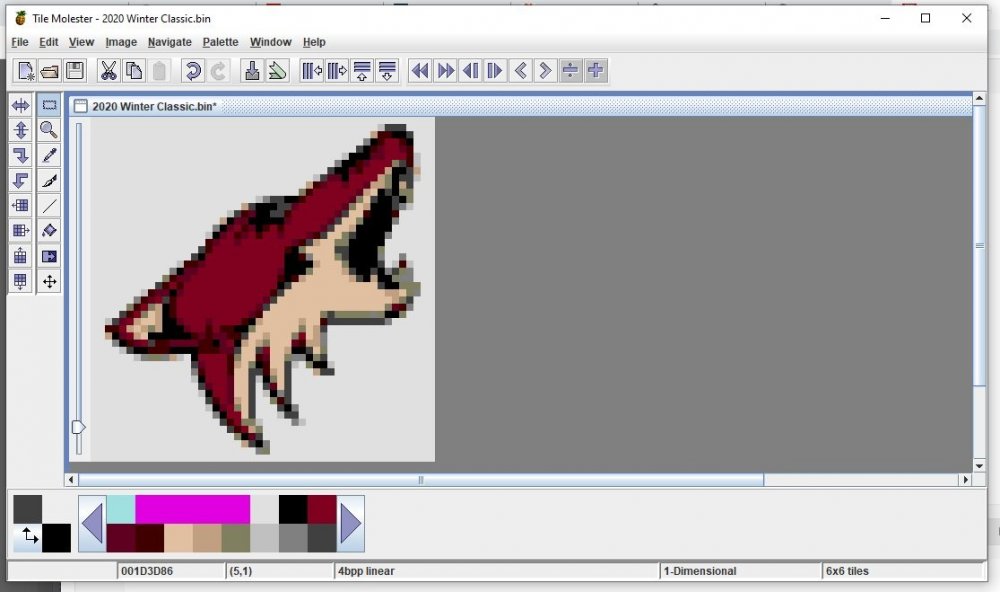
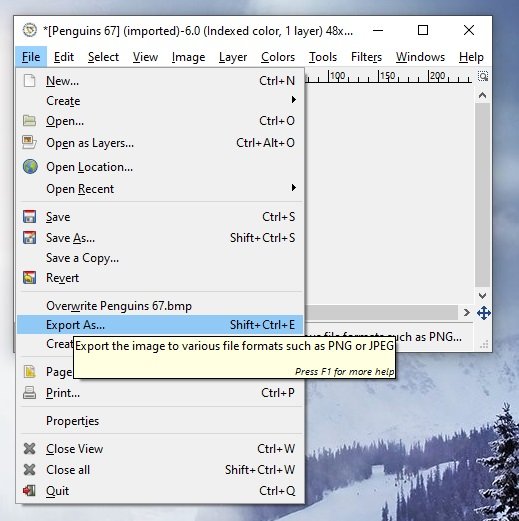
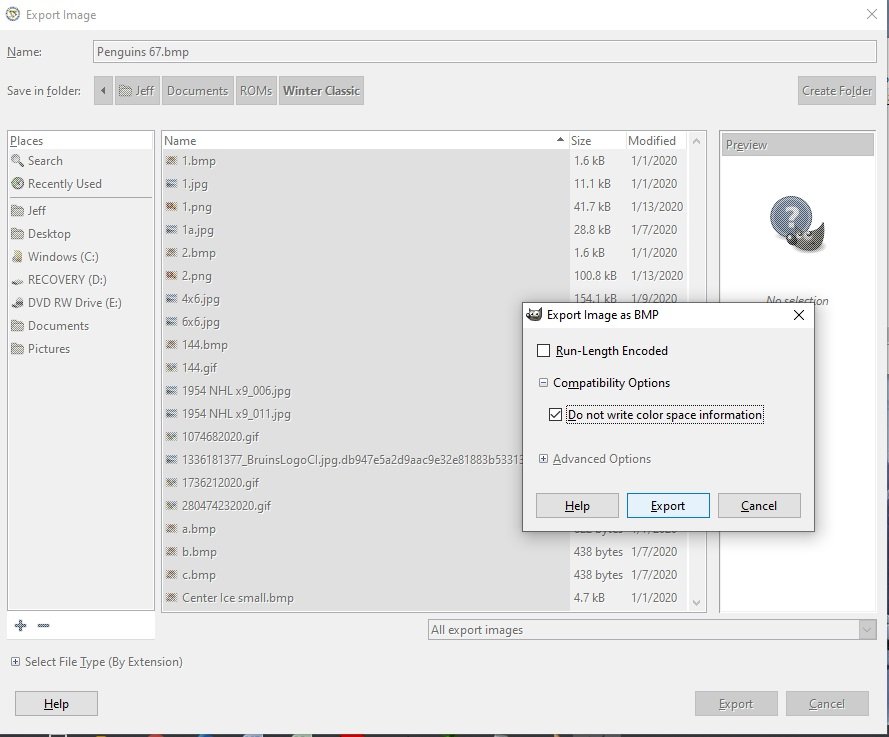
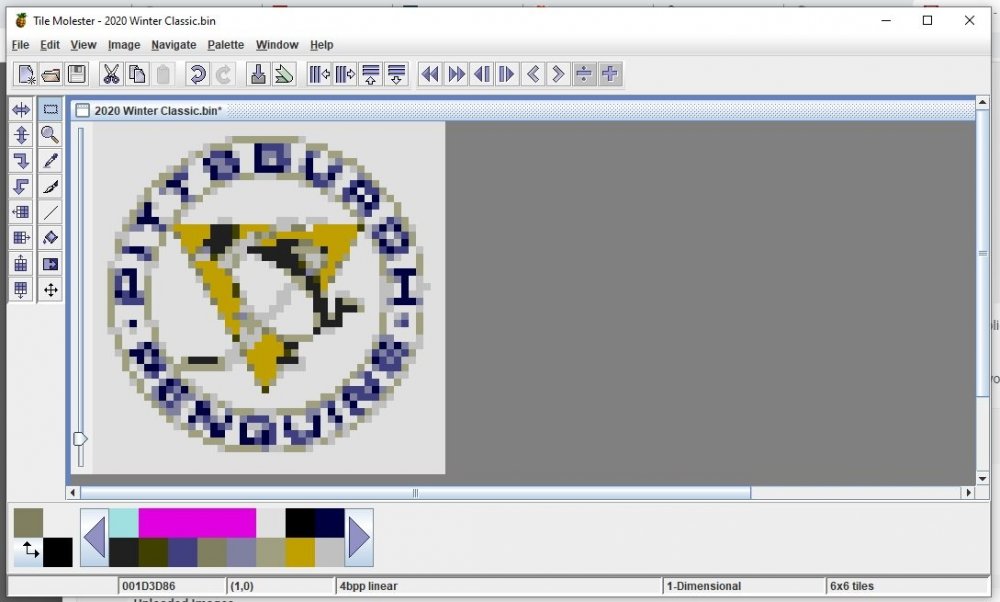
Here's a summary of a conversation between Mr. @Sauce and I had regarding team selection logos. This is the basic outline of the method that I use. Some manual cleanup is still often necessary but it generally gets me a workable image and some consistency. This is just the method that I use, I'm all ears if anyone has other thoughts. I am in no way, shape or form a graphics expert. In fact the below lists the sum of my knowledge of using GIMP. Only figured out enough to accomplish what I wanted to do with reducing the palettes. 1. Download logo from www.sportslogos.net. I like using the small 150x100 .gif files because they're already sort of preshrunk and they are also in the right proportions for using as center ice logos. More on that later. 2. Using Paint, I shrink the image to a maximum height OR width of 46 pixels (depending on orientation) in order to give a minimum pixel border on each side. Regardless of how you want to crop, resize to 48x48 and save as a 24-color .bmp. I also take out any TM or R marks at this point because they're too small to see at scale anyway. 3. Using GIMP, I open the file and convert to an indexed image. Image => Mode => Indexed. 4. There are 9 available slots in the Tile Molester palette for team selection logos. You'll want to convert your logo to fewer colors in order to have it match the palette in Tile Molester. Depending on how many colors are in the logo you can reduce it to as few as 1 color (plus B&W). Generally I prefer to use as many colors as I can so that it gives a fade effect. Fewer colors can produce a "too sharp" effect, but it's all just style and preference. In Indexed Color Conversion, select "Generate optimum palette". You'll already have white permanently available in the palette so you can select up to 10 as the maximum number of colors. 5. After converting your image the colormap will show the colors that were used. (If the colormap is not visible, go to Windows => Dockable Dialogs => Colormap in the GIMP menu bar). Copy the 6-digit HTML notation to notepad, then scroll to the next color using the arrows in Color index. 6. To save your reduced-color image go to File => Export As. IMPORTANT: while saving, make sure that you have checked the Do not write color space information box. 7. In Tile Molester, navigate to where you want to insert your new logo and load the correct palette: 7. Double click the color that you want to change (don't touch the first 7 colors as they are attached to the team selection banners). Select the RGB tab and copy/paste your color code from notepad and hit OK. Tile Molester will automatically convert to the nearest available RGB color. Since there are only 256 specific colors available to the game, occasionally 2 colors are so close that Tile Molester will consider them the same and you could have duplicate colors in the palette - it's not a problem. 8. Once all the colors have been changed, go ahead and paste your logo into your ROM. Generally speaking the images come out pretty good but occasionally you'll want to make a tweak or two to fine tune. 9. Here's how it looks in-game: 10. For this example, I probably would have tried to darken some of the detail in the penguin (gloves, scarf) and maybe a little in the text to sharpen it up.


 1 point
 -
I love both 94 and 95. EA really did a phenomenal job on the whole series and most sports games in the 16 bit era. I got one of those 800 game genesis carts on amazon and amazed how well the EA games hold up compared to some of the other sports games back then. So here’s my off the top of the head tail of the tape 94-95 on Genesis Camera Angle - 94. In 95 they tilted the angle up a bit and doesn’t look right. From what I heard EA wanted the game to look different every year so people would keep buying the game yearly. Skating - 95. They really tightened the controls in 95 and I feel it’s the best control ever created in the history of mankind. 94 feels like you are pulling a semi trailer compared to 95. Passing - 94. Passing is a work of art in 94. It’s my favorite part of that game. Watch some vids on 94 especially 2 on 2 and be amazed. They nerfed passing in 95, less passing options and harder to tic tac toe Goalies - Push. Goalies in 95 are less volatile and stay at home but that also limits the ways you can score. Manual Goalie control in 95 Is also much easier to control and stop shots..Maybe too good. Shooting - starting to fatigue on typing, losing energy, digging deep to finish tale of tape... 94 you can score from farther out. So defense is spread out a bit more. Backhands in 95 are much more accurate than 94. Will give to 94 because of variety, but it’s almost too close to call. Options - 95 in a landslide. Full season and you can control every team, 2 on 2 mode, create a player end season awards, trading. Final score - Nhl 93 because of fighting and the Swingers scene...1 point
-
@DrBill there are some NHL 95 Disciples here too but we are to busy kissing chicks and doing push-ups to learn how do to online play. glad you found the site and I’d do the blue controller too...1 point
-
You are the legend @UltraMagnus for doing this work. We aren’t even computer literate enough to get a group to play online so anything we can bring to the live console is awesome.1 point
-
Just confirmed with @McMikey that he's in the works to try and get this on YouTube at some point. That's good news, we just have to be patient.1 point
-
1 point